Cashmerette - Elmwood Skirt
I became a Cashmerette Contributor in February 2023. The first pattern I made was the Elmwood Pencil Skirt.
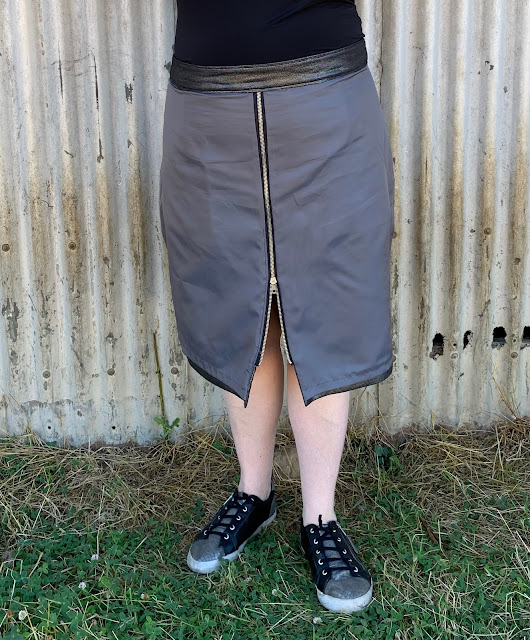
I am not one to stick to the rules and I like to hack the patterns so with this one I added a centre front zip and zipper teeth details to the pockets.
Elmwood Skirt
Exude confidence with the Elmwood Skirt! The Elmwood is a sleek woven pencil skirt designed for curves with hip-hugging side seams, back darts, and a curved waistband. View A is knee-length with a back slit and front angular pockets that stay flat when you sit, while View B hits above the knee with no pockets. Featuring a full lining and invisible centre back zipper, the Elmwood is the sophisticated (yet simple to sew) skirt your wardrobe has been waiting for.
Sizing
0-16 & 12-32 as PDF download. I made a size 18 in the end.
Suggested Fabric: Mid-weight woven fabric such as wool suiting, linen, poly/cotton, or poly/wool blend.
Lining: Lightweight lining fabric such as rayon Bemberg.
I used a foiled linen from DK Fabrics which I block fused interfacing too.
I made view A with pockets.
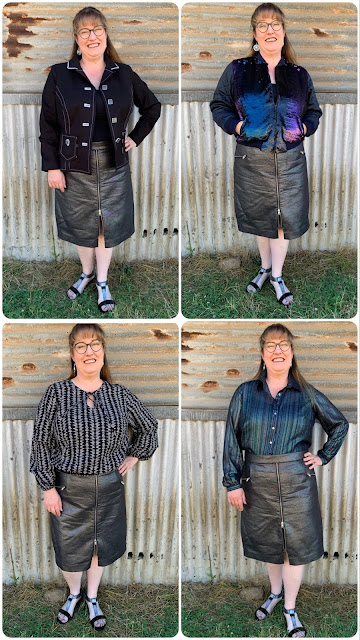
I wanted a skirt to complement my endless wardrobe from the 2022 Sewing.patternreview contest so I made my skirt in a metallic charcoal linen fabric.
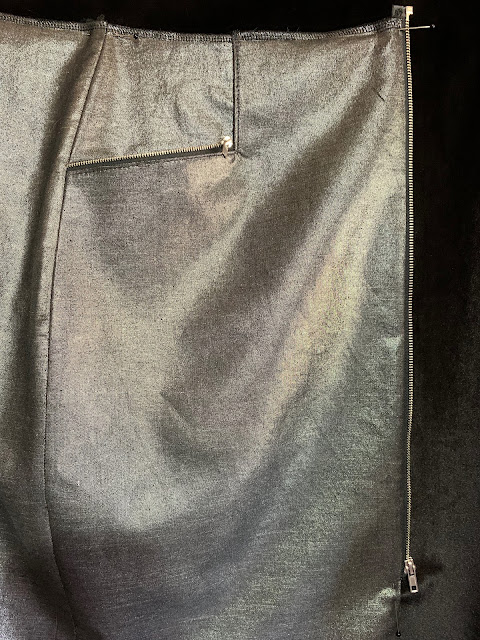
I added the centre front metal zip and faux zip pockets for detail and interest.
I wanted a skirt to complement my endless wardrobe from the 2022 Sewing.patternreview contest so I made my skirt in a metallic charcoal linen fabric.
I added the centre front metal zip and faux zip pockets for detail and interest.
The blue lines show how much of the hip I shaved off to fit my shape. I had to then move the pocket opening over to maintain its size and shape.
Fit Changes
I started with the size 20 according to the fit measurements.
I made this in trace’n’toile as a test run with my centre front zip detail and pockets but no lining.
I made this in trace’n’toile as a test run with my centre front zip detail and pockets but no lining.
I straightened off the side seams a lot as I don’t have a lot of hip shape and the pattern allows for more than I need.
I took the skirt in at the waistband and upper side seam 2cm each side.
With the sides straightened out I had lost 6cm of my pocket opening so I had to move the pocket cut out shape on the skirt over so I would have the same width of pocket as before.
I used the teeth and zip from a trouser zip like piping, sewing it between the pocket facing and skirt front.
I redrafted the edge of the pocket bag and facing to fit the new side seam shaping. I used the linen fabric for the pocket pieces but still added the pocket facing pattern piece over the top.
I cut out and interfaced all the pocket pieces as instructed. I also interfaced the pocket bag and facing.
I opened out the 18cm trouser zip and using my paper scissors snipped off the bottom end so I would have two lengths of zipper teeth. I did some hand stitches at the raw end of the zip teeth to stop the zipper pull falling off. On the other piece of zip I slid on a matching zipper pull cannibalised from another zip. I made sure to slide to pull on so it was the opposite to the first one. This way I would end up with a left side and a right side for my pockets.
I marked the seam allowance on the wrong side of the top pocket piece then snipped into the pivot point. I pinned the zip tape, right sides together so the metal stopper end sat just inside the pivot point and the tape sat towards the side seam edge with the tape edge level with the fabric edge. I folded the end of the tape back on itself so it would be on the inside of the pocket bag.
I baste stitched the zipper to the top pocket piece then sewed the top pocket to the skirt front as the pattern instructed, clipping the corner seam allowance so the corner would sit flat.
Zipper Detail - Centre Front
I drafted my trace’n’toile skirt with a centre front seam instead of on the fold.
That was the only design pattern change I made to the physical pattern to add in the front zip.
This CF seam was also added to the lining layer for the finished skirt.
I drafted my trace’n’toile skirt with a centre front seam instead of on the fold.
That was the only design pattern change I made to the physical pattern to add in the front zip.
This CF seam was also added to the lining layer for the finished skirt.
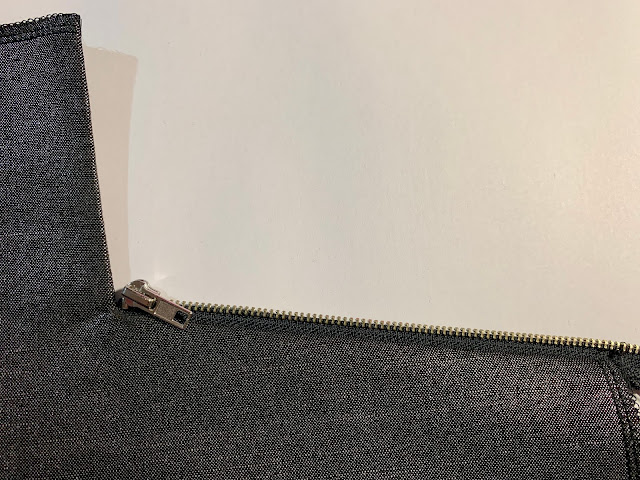
I inserted my CF zip so the separating end that normally goes at the bottom of the jacket was above the top of the skirt front waist seam. The end could then be chopped off and it would be concealed and secured inside the waist band.
I pressed the original seam line into the linen as a marker then using a rotary mat and cutter trimmed off the excess fabric to leave a very precise seam allowance calculated to allow my zipper teeth and some tape to show while maintaining the original width of the skirt. I separated the zip into two sides first and attached it to the skirt one side at a time.
I pinned the zip tape and skirt front, right sides together on the straight fabric edge. I sewed it so the needle was about 5mm away from the teeth.
I pressed the CF seam from both sides.
Waistband
I added some light weight buckram to my waistband to help support the linen. I constructed my waistband as one piece, understitched the seam allowance and pressed it out.
I added some light weight buckram to my waistband to help support the linen. I constructed my waistband as one piece, understitched the seam allowance and pressed it out.
I pinned the waistband to the skirt with the right side of the upper waistband to the skirt waistline. After stitching it I pressed the seam allowance up towards the waistband. I pressed bottom edge of the inside waistband over 1cm, when the waistband folded down towards the lining side the edge extended just past the waistline seam.
I pinned the inner edge of the waistband to the lining side of the skirt carefully then stitched in the ditch on the right side.
Skirt with the centre back seam at the sides
The next thing to do was attach the CB metal zip then sew the centre back seam to the top of the skirt split.
I finished off the centre front edge of the skirt below the zip, pressed and hand sewed the hem.
Top right: Kimball Bomber Jacket
Bottom left: Alton Top
Bottom right: Vernon Blouse


