HONEYCOMB HANDBAG
I have been making my own handbags for years now, since I bought my first iPad I could not find a suitable handbag that had a place to fit it. I mostly use only one handbag as I hate transferring stuff from one bag to another just to be fashionable.
This year I stepped up the look of my bag by getting faux leather from Emmaline Bags.
I chose metallic purple which is my favourite colour with complementary colours turquoise and silver. I bought a metre of the purple and the turquoise and half a metre of the silver. I used a purple and turquoise cotton print for the lining I got at Spotlight.
Hardware and zips also from Emmaline bags.
First toile
I started working on the design of this bag in January 2020 but go nowhere fast. I did a lot of procraftinating and making toiles and finally came up with a workable bag.
I made the bag up in drill to test how it functioned and too see if everything was accessible the way I wanted.
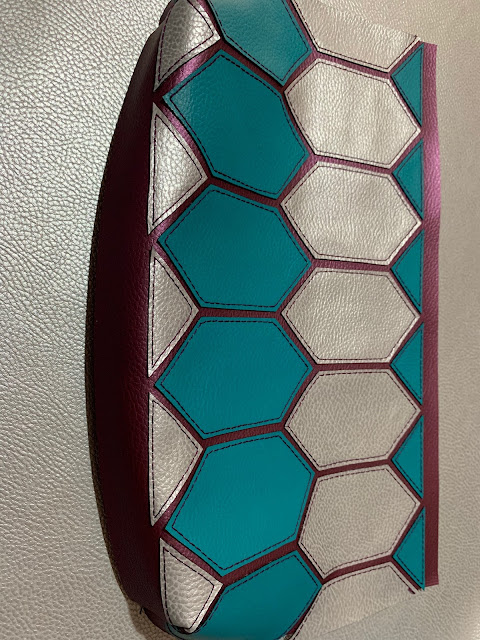
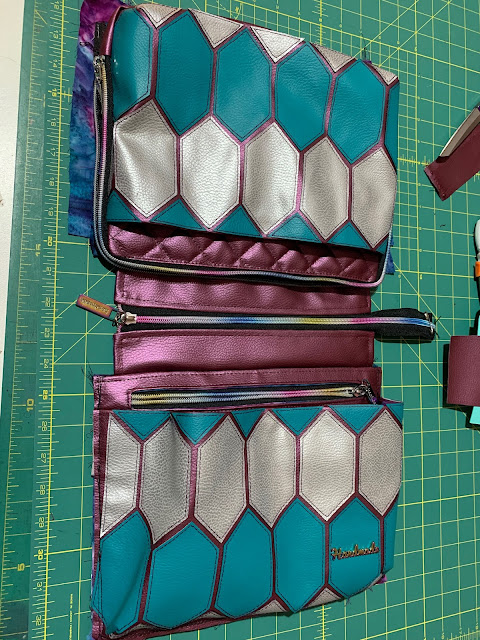
After two main toiles I had a pattern. I cut the bag out of the faux leather and began construction. I was inspired to make the front and back pockets a feature with a honeycomb appliqué. The idea came from a quilted tote bag I saw on Pinterest.
I made a hexagon template and carefully cutout the turquoise and silver leather shapes.
I would have liked to finish the edges of the hexagons with wax but I didn’t really know where to get it so instead i used a good old sharpie and simply coloured the edges carefully with black.
I used a stitch length of 4 and test sewed around a hexagon to see if the stitches would sort of fit evenly and look symmetrically the pivot points.
I used double sided tape placed in the centre of each piece to position the hexagons in place on the base purple but so the tape was not in the stitching line. I used a top stitching thread to sew them all down.
Front Pocket
Wrong side of pocket
Holes punched into the pocket for the Handmade script metal label
Metallic rainbow label
I ended up making this part twice because the first time I sewed the zip in place I curved it top corners and it would not attach to the main bag. The second time I kept the corners and pivoted the zip at the corners.
Sewing the whole bag was tricky as I did not want to have to put binding on any exposed internal seams.
First Version with rounded corners
Second version with square corners
Front Pocket Lining
Lining fabric for the inside of the bag. This panel has pockets sized to fit phone and card holder.
Inside lining with a recycled welt panel pocket.
I made the front pocket added the lining, then the back pocket with attached iPad pocket. I made the flaps for the centre opening zip. I joined sewed the flaps to the front and back. The centre zip is cut form a continuous zip so I could undo the zip by pulling the zipper pull off the end and thread it back on after the bag was complete.
The side that faces the front when carried has a D ring attached. I was very careful to add extra stabiliser to the inside of the leather to support the weight it might carry. I didn’t want it to just rip the fabric when I used it.
Next I sewed the sides to the base to make it one piece. I attached this to the front pocket and then added the lining.
I cut a piece of quilting template plastic for the base and sewed a layer of stiff felt to it. I measured and marked the position of the base feet.
I added the base stabilising felt and plastic to the wrong side of the base leather. I used a craft knife to cut the feet slits into the leather. The feet have butterfly split pins which thread through the fabric and open to secure.
Sides attached
I turned the bag so the right sides were facing in and sewed the back pocket onto the base and sides. I hand sewed the lining in place on this side.
Next I had to turn the bag right side out. This was tricky because the plastic and foam base did not enjoy the ride....but boom my bag was born!
I made the strap and added the hardware so the length could be adjusted.
I attached the middle zipper pull and finished off the end with some leather.
I reattached the zipper pull to the centre zip and secured the end with some fabric.
Lastly I made a jacket keeper. I also got this idea from Pintrest and this was the reason for the D ring.
I cut a strip of purple leather, folded it over and topstitched around the edges. I used a swivel hook and threaded the strap through the ring and sewed it in place. Then I added some brass snaps.


