Generational Christening Gown
 My Aunt passed away in late July 2021 and my cousin gifted me her wedding dress. At my Aunts funeral, her grandson expressed his deep sadness that his Nanna would not be at his wedding in November 2021. She had been greatly looking forward to it after a very long wait for him to propose to his girlfriend of 10 years.


My Aunts Wedding Dress
I do not have children of my own, so once I received her dress and had it cleaned and decided to create a unique Christening Gown from it. I wanted it to be for my extended family to hand down through the generations.
My Aunt was my Mothers Sister so I decided to use wedding dresses from the matriarchal side of my family and the future bride.

I have had a signed copy of Martha Pullen's Grandmother's Hope Chest since 1993 when I met her in Sydney Australia at a Pfaff sewing machine convention. I won it in a competition! I then worked in sewing machine retail and was 20 years old with hopes to have my own family one day.
I have been married for over 25 years now but we have never had children. As I am an only child, my parents will never have grand children of their own unfortunately.
I never thought I would have need of this beautiful book until now.
So I thought this would be a very serendipitous opportunity to make something special from this book.

5 of the 6 dresses I used
In addition to my aunts wedding dress I gathered together my mothers dress, my wedding dress, the brides mothers dress, my cousin's dress (she is the mother of the groom) and even some fabric from the brides dress as I had offered to hem up for her.
As you can see, I now had 6 very different wedding dresses spanning 55 years of fashion trends.
The Dresses
My Aunts dress showing the train

Here is a rundown of the dresses pictured left to right.
(Far left dress) My Aunts dress from 1967. An ivory empire line dress with a heavy crepe back satin bodice and an a-line skirt. The satin side was right side out, it was overlaid with a polyester rose pattern lace.
The dress had long lace sleeves that buttoned at the wrist and a lace overskirt with train. The front also had some AB crystals and clusters of tiny pearls.
My mothers dress and cape


the lace dress by itself
(Second from left) My Mothers dress from 1969 was an empire line guipure lace dress with rayon underling and a cotton lining, 3/4 sleeves in tulle lined lace, a round neck and underbust lace motive detail. Over this she wore a heavy rayon satin sleeveless floor length cape with shoulder bows. The wedding dress and cape were yellowed form storage and the colour did not match any of the others so I soaked them both in Nappysan to whiten them up. The cape was very stained and did not get any better after soaking. I really liked the style of this garment so I just decided to keep it for myself to draft a pattern from one day. My cousins dress


(Third from left) My cousins (my aunts daughter) dress was from 1990. She wore a crystal organza and guipure lace motive dress with mutton sleeves fitted from the elbows to the wrist, sweetheart neckline with organza covered decolatage and neckband lace detail. Classic v waistline with gathered organza skirt and border lace hem. It was very shiny, it was the 90's! I also washed this one by hand to remove the yellowing.
My Dress

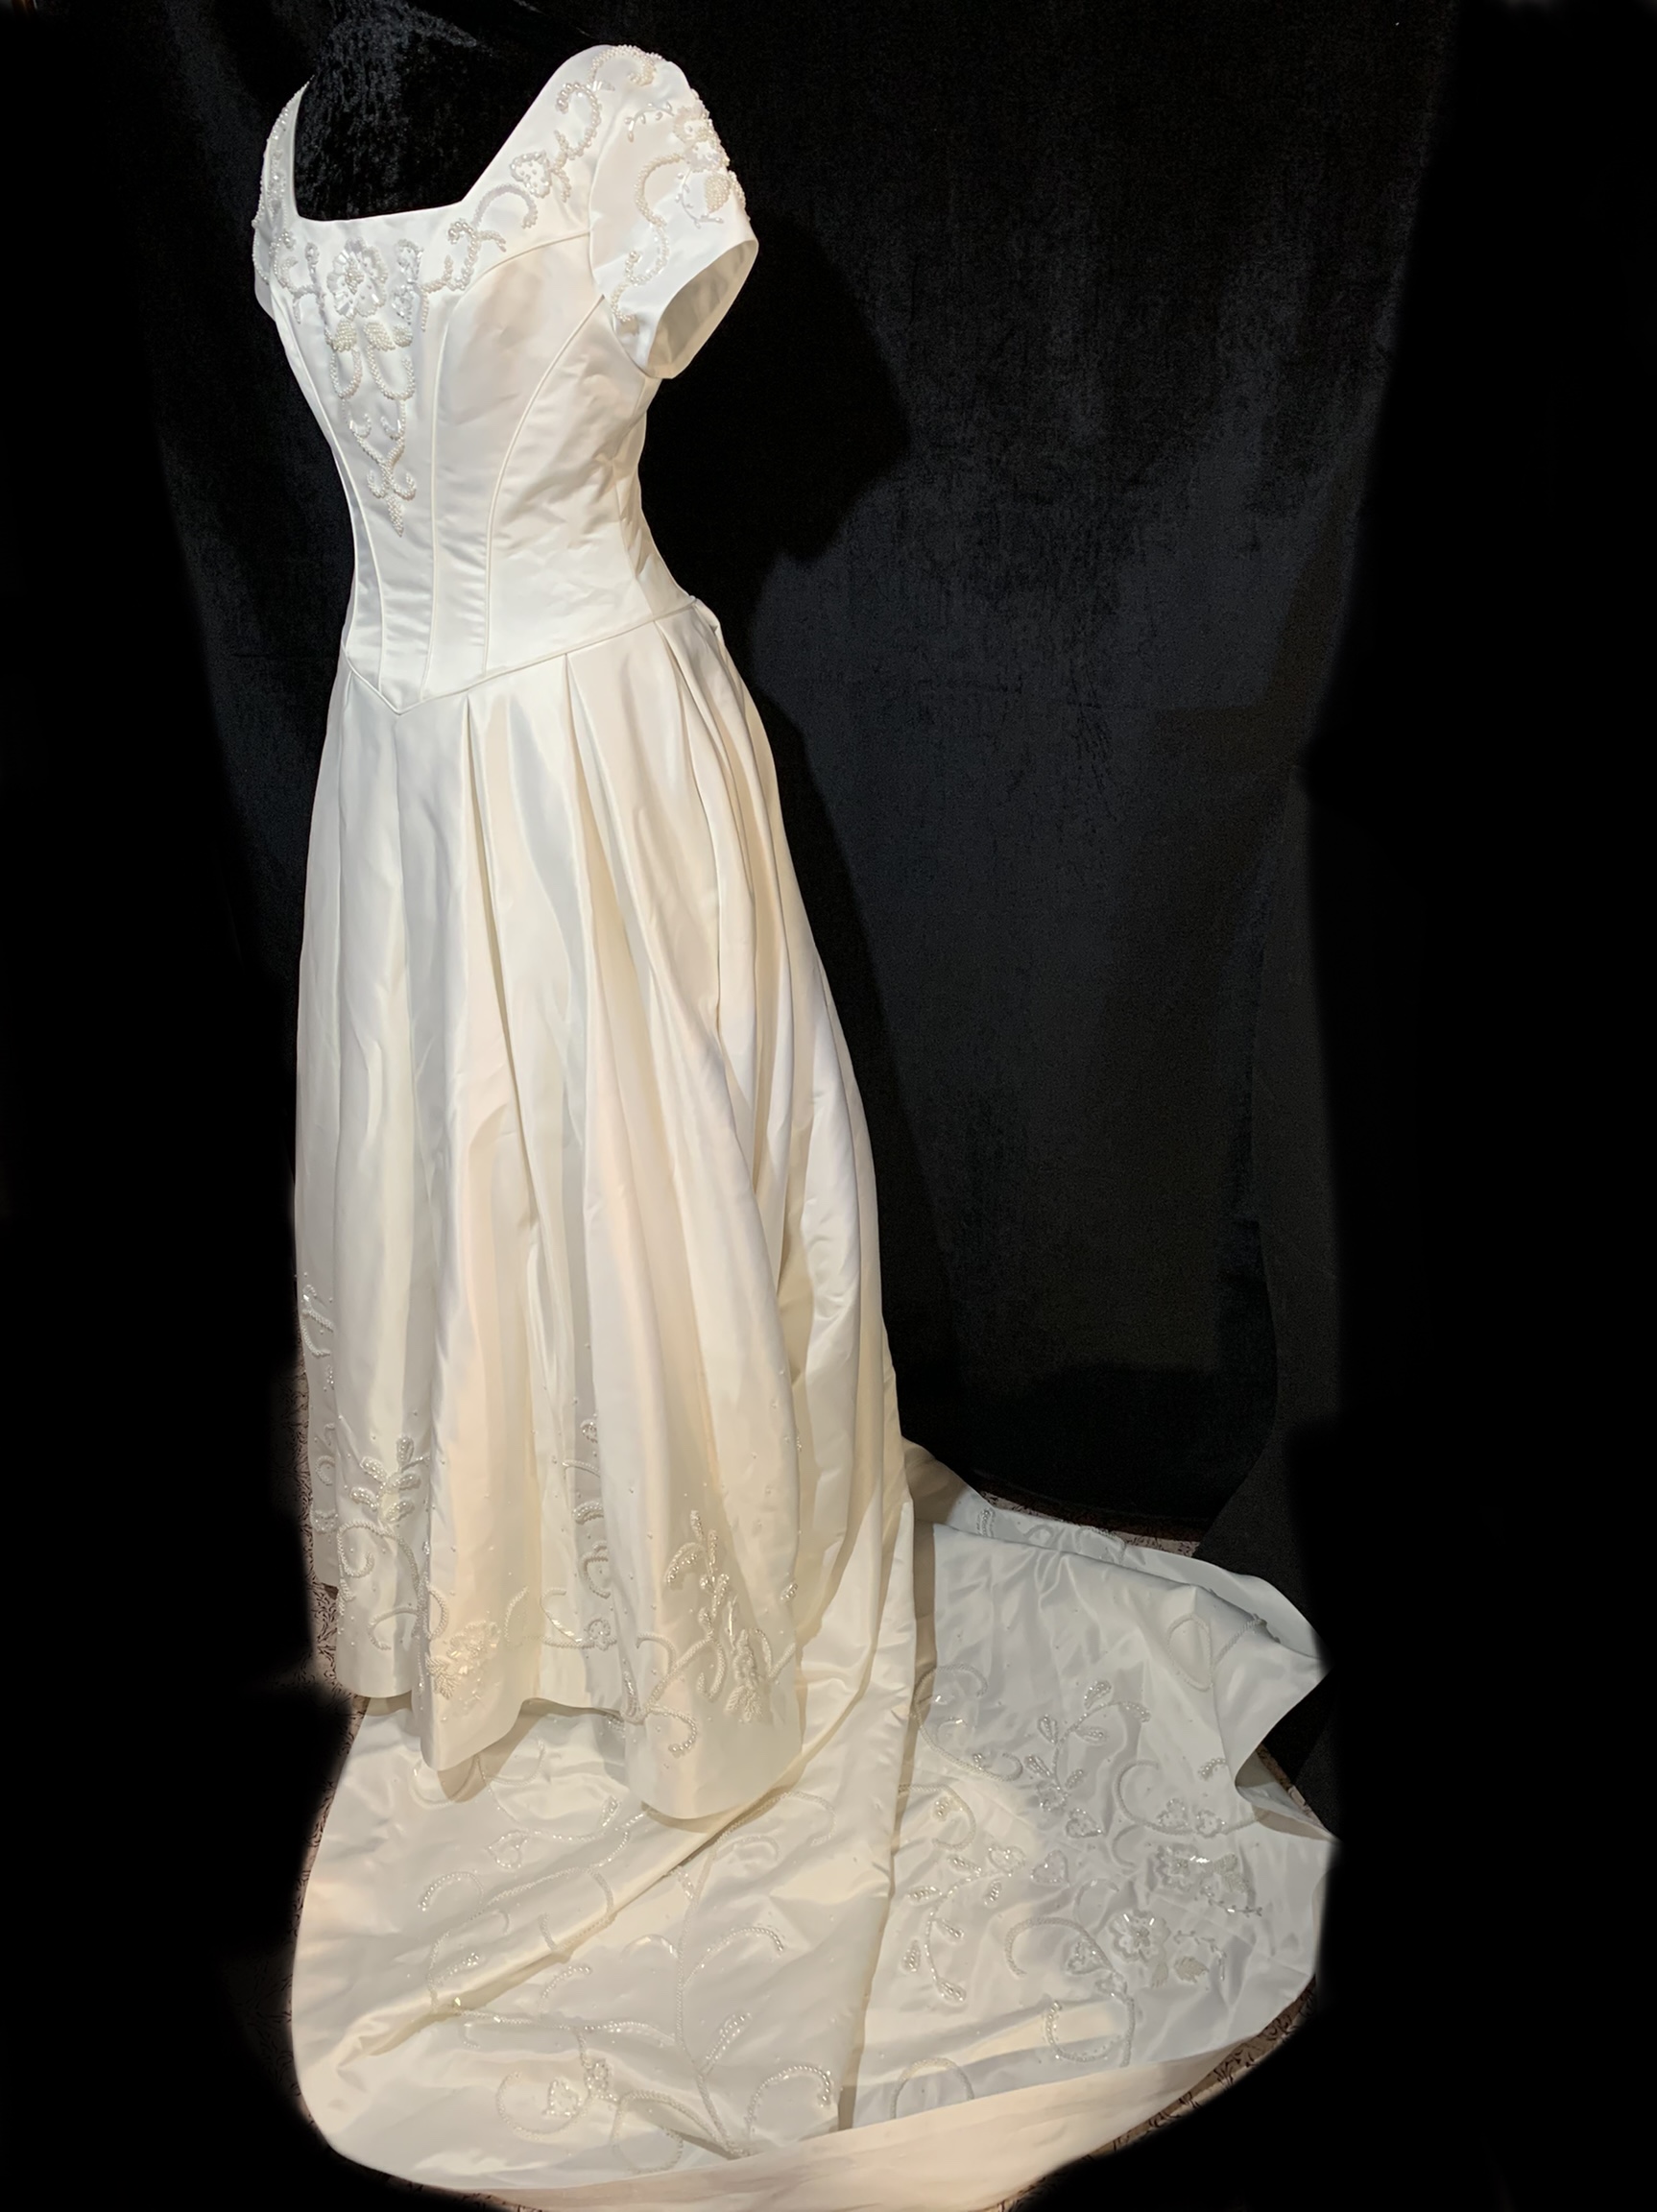
(Third from right) My dress from 1999 was a delustered satin short sleeve dress with piped princess seams, pleated skirt with full train and a V waist. Decorated with frosted bead embroidered motifs on the bodice and hemline. Mine is the only dress with beading and no lace.
Mother of the Brides dress
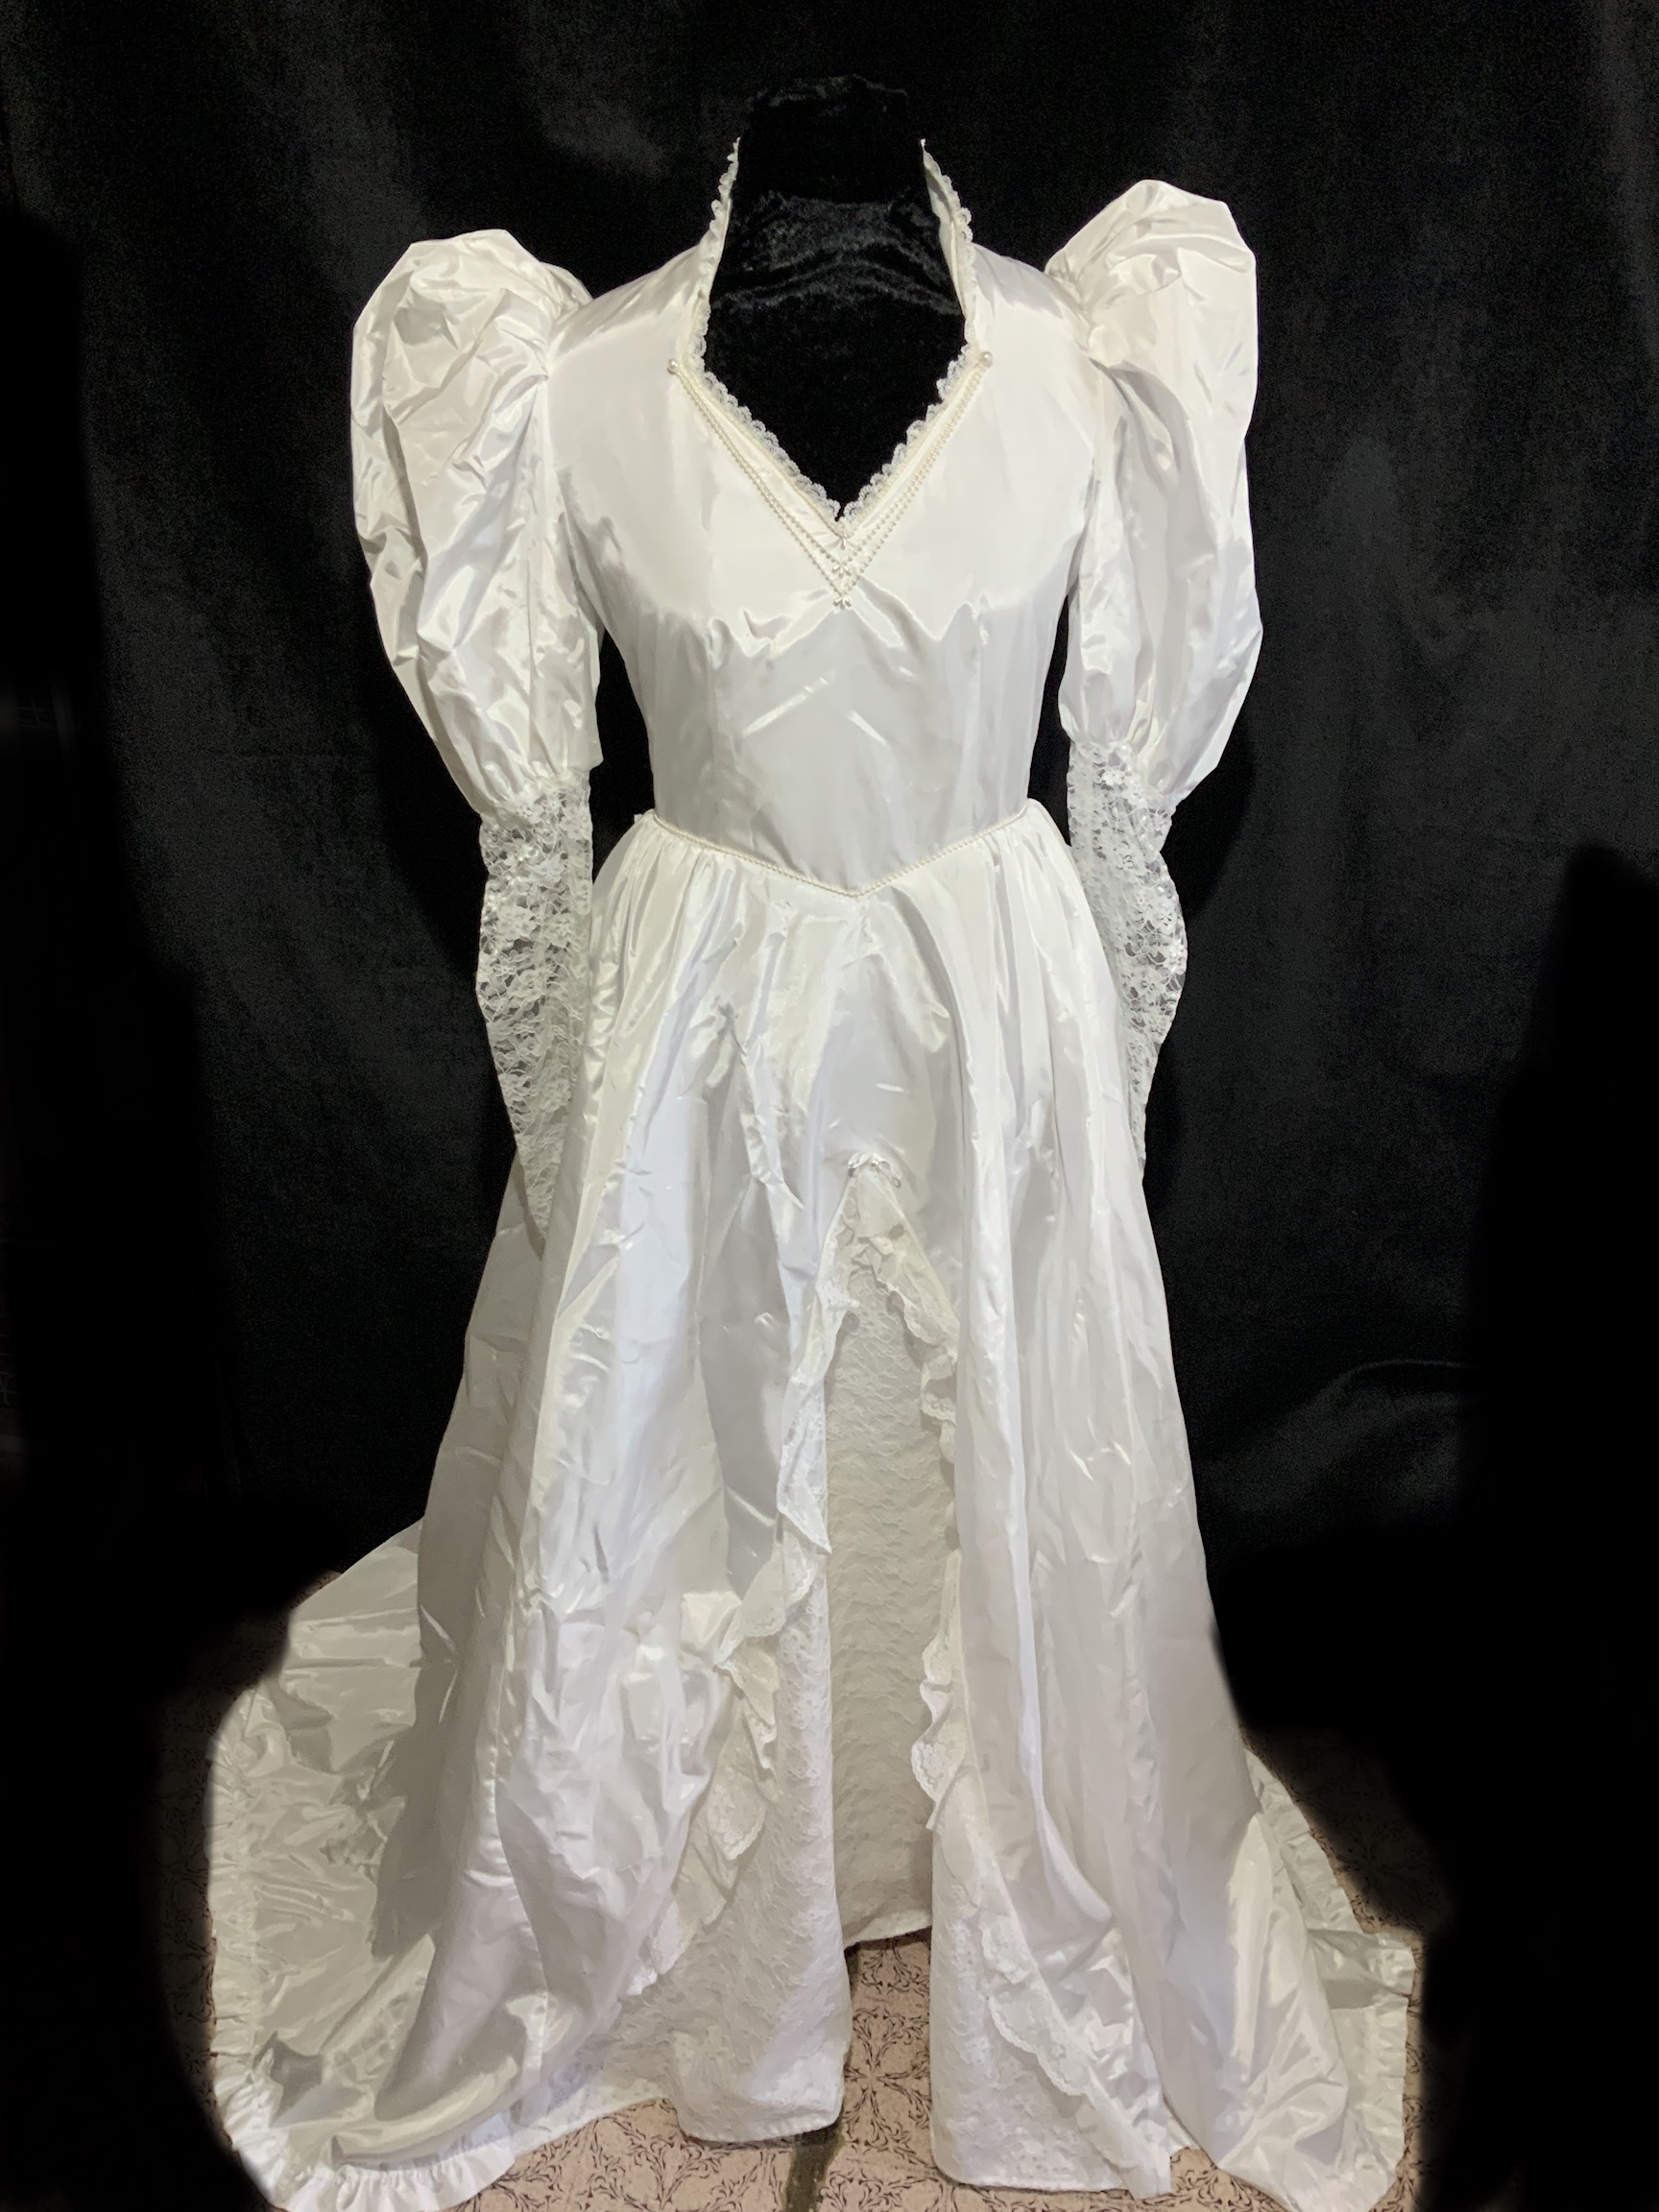

(Not pictured) The brides mother's dress was a white taffeta gown with train. Gathered piped V waist, princess neckline with high collar and mutton sleeve. It had lace lower sleeves from the elbow to wrist with pearl buttons. The skirt has a front lace insert and ruffled hem and ruffled in the back side seam.
Bride to be dress

(Far right) The brides dress from 2021 is a beautiful fit and flair ivory dress with train. Sweetheart neckline, sleeveless with an unlined lace back. The dress has 4 layers, starting at the inside a satin lining with a tulle layer on top, then a sparsely sequinned Chantilly lace layer and on top a tulle layer with 3D lace motifs that start at the hemline and then cover the bodice.
Design
So I had quite the pallet of fabrics and trims to use. How to incorporate such a variety of fabrics in a cohesive way, preserving the past while creating a functional Christening gown that would showcase its history.
This is where Martha Pullen's book came into the picture. I honestly never thought I would use this book and in fact tried selling it about a year before I received my Aunts dress.
There are a number of complicated Christening dress patterns to choose from in the book. I decided on a pattern which had pointed godets and a yoke with long sleeves.
There are a number of complicated Christening dress patterns to choose from in the book. I decided on a pattern which had pointed godets and a yoke with long sleeves.
The pattern had a high yoke with pointed gore panels and I added short puff sleeves from another pattern instead of the long sleeves.

I chose the godets because I thought this would be a good way to showcase each dress in a panel of its own. I also want a pattern that could be added to over the years. By having the godets self lined as independent panels I thought future generations could add more godets to the dress as needed. It could be a perpetually increasing history of my family.
I know Christening gowns are usually made of voile, cotton and soft natural fabric but this one is mostly synthetic with a bit of silk and a cotton lining.
Construction
Skirt
I traced off the godet panel from the pattern sheet but I changed the shape to an elongated pentagon. The original was designed to have smaller godets inserted around the hem but I wanted a smoother skirt design.

I cut a panel from the main fabric of each dress. I tried to replicate the design of the dress or at least represent its overall design with the addition of its embellishments like lace, ruffles and beading from the dress.
As the Bride to be had not actually worn her dress yet I used the detachable lace and net sleeves she was not going to wear. This was very handy as the creation of this dress was a complete secret!

My Aunts dress

My Cousins dress

My Mothers Dress

My Dress

Bride to Be dress

Mother of the Brides dress - I changed the design of this panel as my first vision was too ruffly and didn't complement the other panels.
I cut lining for each panel from the lining of my own dress as it had a full skirt with train and the fabric was a nice matt finish.

I ended up changing the panel for the Mother of the Brides dress from that pictured above. (second from left)

To do the embroidery I typed all the names and dates in Snell Roundhouse font size 48 and printed them out. I used a Frixon Pilot pen to trace the letters onto the right side of the lining panel.

I placed the fabric in a wooden hoop to keep it taught.

I freehand machine embroidered the names in an ecru thread, snipped all the connecting threads and ironed the panel. The Frixon ink disappears with heat.


This made the point nice and sharp. I straight stitched the fabric to the lining wrong sides together then overlocked around the panel.

For the brides dress I was fortunate that she had given me the detachable net and lace sleeves that came with her dress because she wasn't going to use them. This meant I could make a panel from her dress straight away as there wasn't enough fabric from hemming her dress to actually make a panel.

I cut fine tulle panels from my cousins dress skirt lining and mounted the brides lace motifs on this. I backed the panels with the satin from my aunts dress. I made two panels from these fabrics but only embroidered the lining of one with the brides name. The other is a place holder of sorts for my cousins daughter if she gets married in the future and wants to add her dress to the gown.

matching panels from the Bride to Be
I didn't have my Grandmothers wedding suit which was from 1943 but I did have a photo of it showing its design and embroidery detail quite well. She wore a 3/4 sleeve V front jacket with couched detail over a knee length dress with front pleats and a matching self covered belt, gloves and a lace cover hat.


I decided to replicate this design in a similar fabric and have it as the centre back panel. I used ivory silk for the panel and couched a decorative thread using a freehand machine embroidery bobbin work technique in a stippling pattern over the panel.

from left to right panels 1 - 2 - 3 - 4 - 5 - 6 - 7 - 8
Because this Christening Gown was inspired by the receipt of my aunts dress I used her dress for the centre front skirt, panel 4.

To the left of the front panel is the brides mother dress (3) and to the right of the front panel is the grooms mother dress (5), just like the seating in a traditional Christian wedding.
The brides panel (6) sits next to her mothers and the place holder panel (2) sits next to my cousins panel. These two matching panels are on the sides of the gown.

Bodice
The back yoke of the Christening Gown is the back bodice from my Aunts dress and has the garment label attached. Also from her dress I used a zip from one sleeve as the centre back closure instead of buttons. I used the piping from the under bust seam of her dress on the bottom of the bodice and her skirt lace for the sleeves.


The sleeve binding is a piece of the bagged satin hemline I cut off the brides dress.
I didn't follow the pattern instructions except to check to make the sleeve cuff the right size. I bound the side seams with tulle before sewing the seam so the bodice could be easily adjusted in size if necessary. I found the instructions very hard to read and follow, they were not set out in a way that was intuitive for me.
I didn't follow the pattern instructions except to check to make the sleeve cuff the right size. I bound the side seams with tulle before sewing the seam so the bodice could be easily adjusted in size if necessary. I found the instructions very hard to read and follow, they were not set out in a way that was intuitive for me.


For the skirt lining I used the cotton lining from my mother's dress.
On the back of the cotton lining I embroidered a family tree starting with my grandmother showing the relationships between all the contributing brides. I did this in the same way as the names on the lining panels with freehand embroidery. I allowed room for future marriages and babies to be added.

lining

detail of the family tree sewn to the front of the lining
The trickiest bit was and adding the zip. because the centre back panel is centred there was no seam to use to extend the back zip down into. I had to snip into the centre back skirt panel and add a welt like panel for the bottom of the zip.
I am really happy with the finished gown

I made a scrapbooked album with a photos of each bride wearing their dress, included some off-cuts of fabric from their dress. I have the dress boxed in an acid free box with acid free tissue paper.
I have added a review of Grandmother's Hope Chest if you would like to know more about the rest of the https://sewing.patternreview.com/review/book/2147